
Getting Started with CallGauge AI
Register your account, access your created workspace, purchase a tracking number or DNI number pool, attach a call flow and start tracking inbound calls.
How the Initial Setup Works
CallGauge AI creates your first workspace during registration. When you sign in, you are taken directly to that workspace. From there, purchase a single tracking number or a pool of numbers for Dynamic Number Insertion, connect the number to a call flow and place a test call.
Account and workspace
Your first workspace is created when you register.
Tracking number
Purchase one tracking number for a campaign or source.
DNI number pool
Purchase a pool for visitor-level website attribution.
Call flow
Attach a call flow so incoming calls reach the correct destination.
Before You Begin
Have the destination phone number ready where you want CallGauge AI to route incoming calls.
Register Your CallGauge AI Account
Create your account using your business details and an email address you can access. During registration, CallGauge AI creates your first workspace along with the account.
Workspace Creation Is Automatic
You do not need to create the first workspace separately. It is created as part of the registration process.
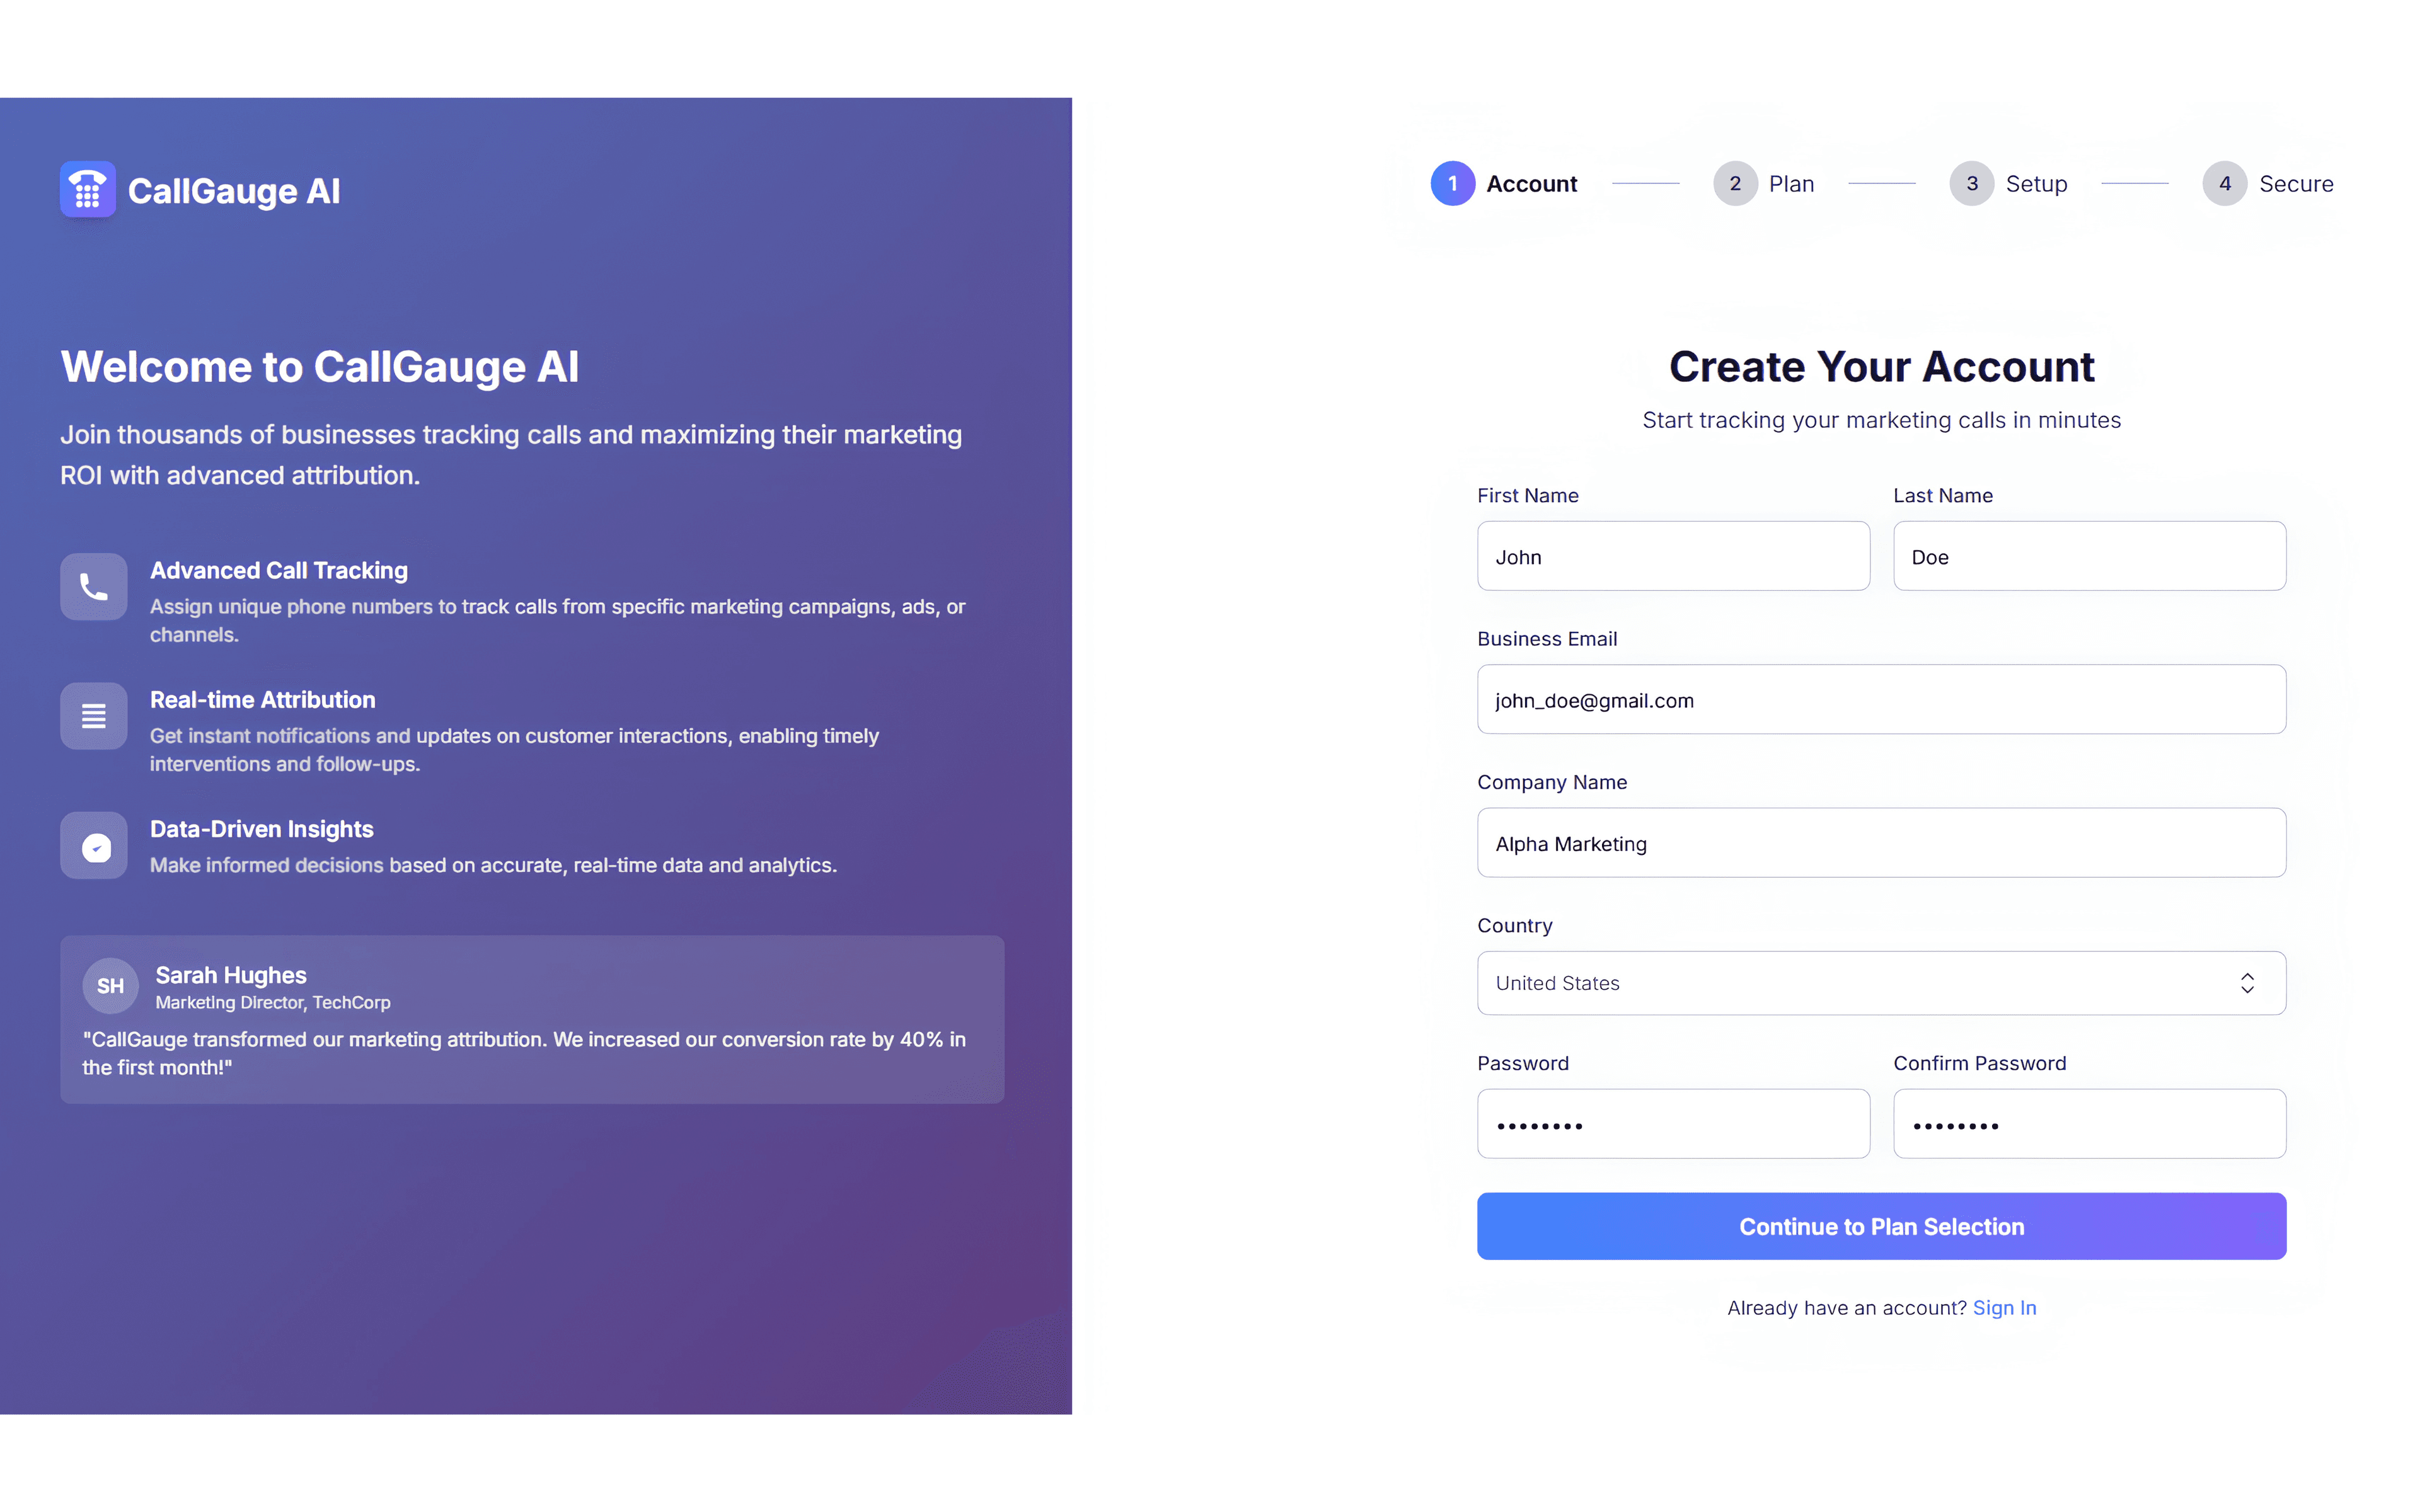
Expected Result
Your CallGauge AI account and first workspace have been created.
Log In and Open Your Workspace
Sign in using your registered email address and password. After login, CallGauge AI takes you directly to the workspace created during registration.
What You Will See
Your workspace contains the tools for tracking numbers, number pools, call flows, call activity, reporting and integrations.
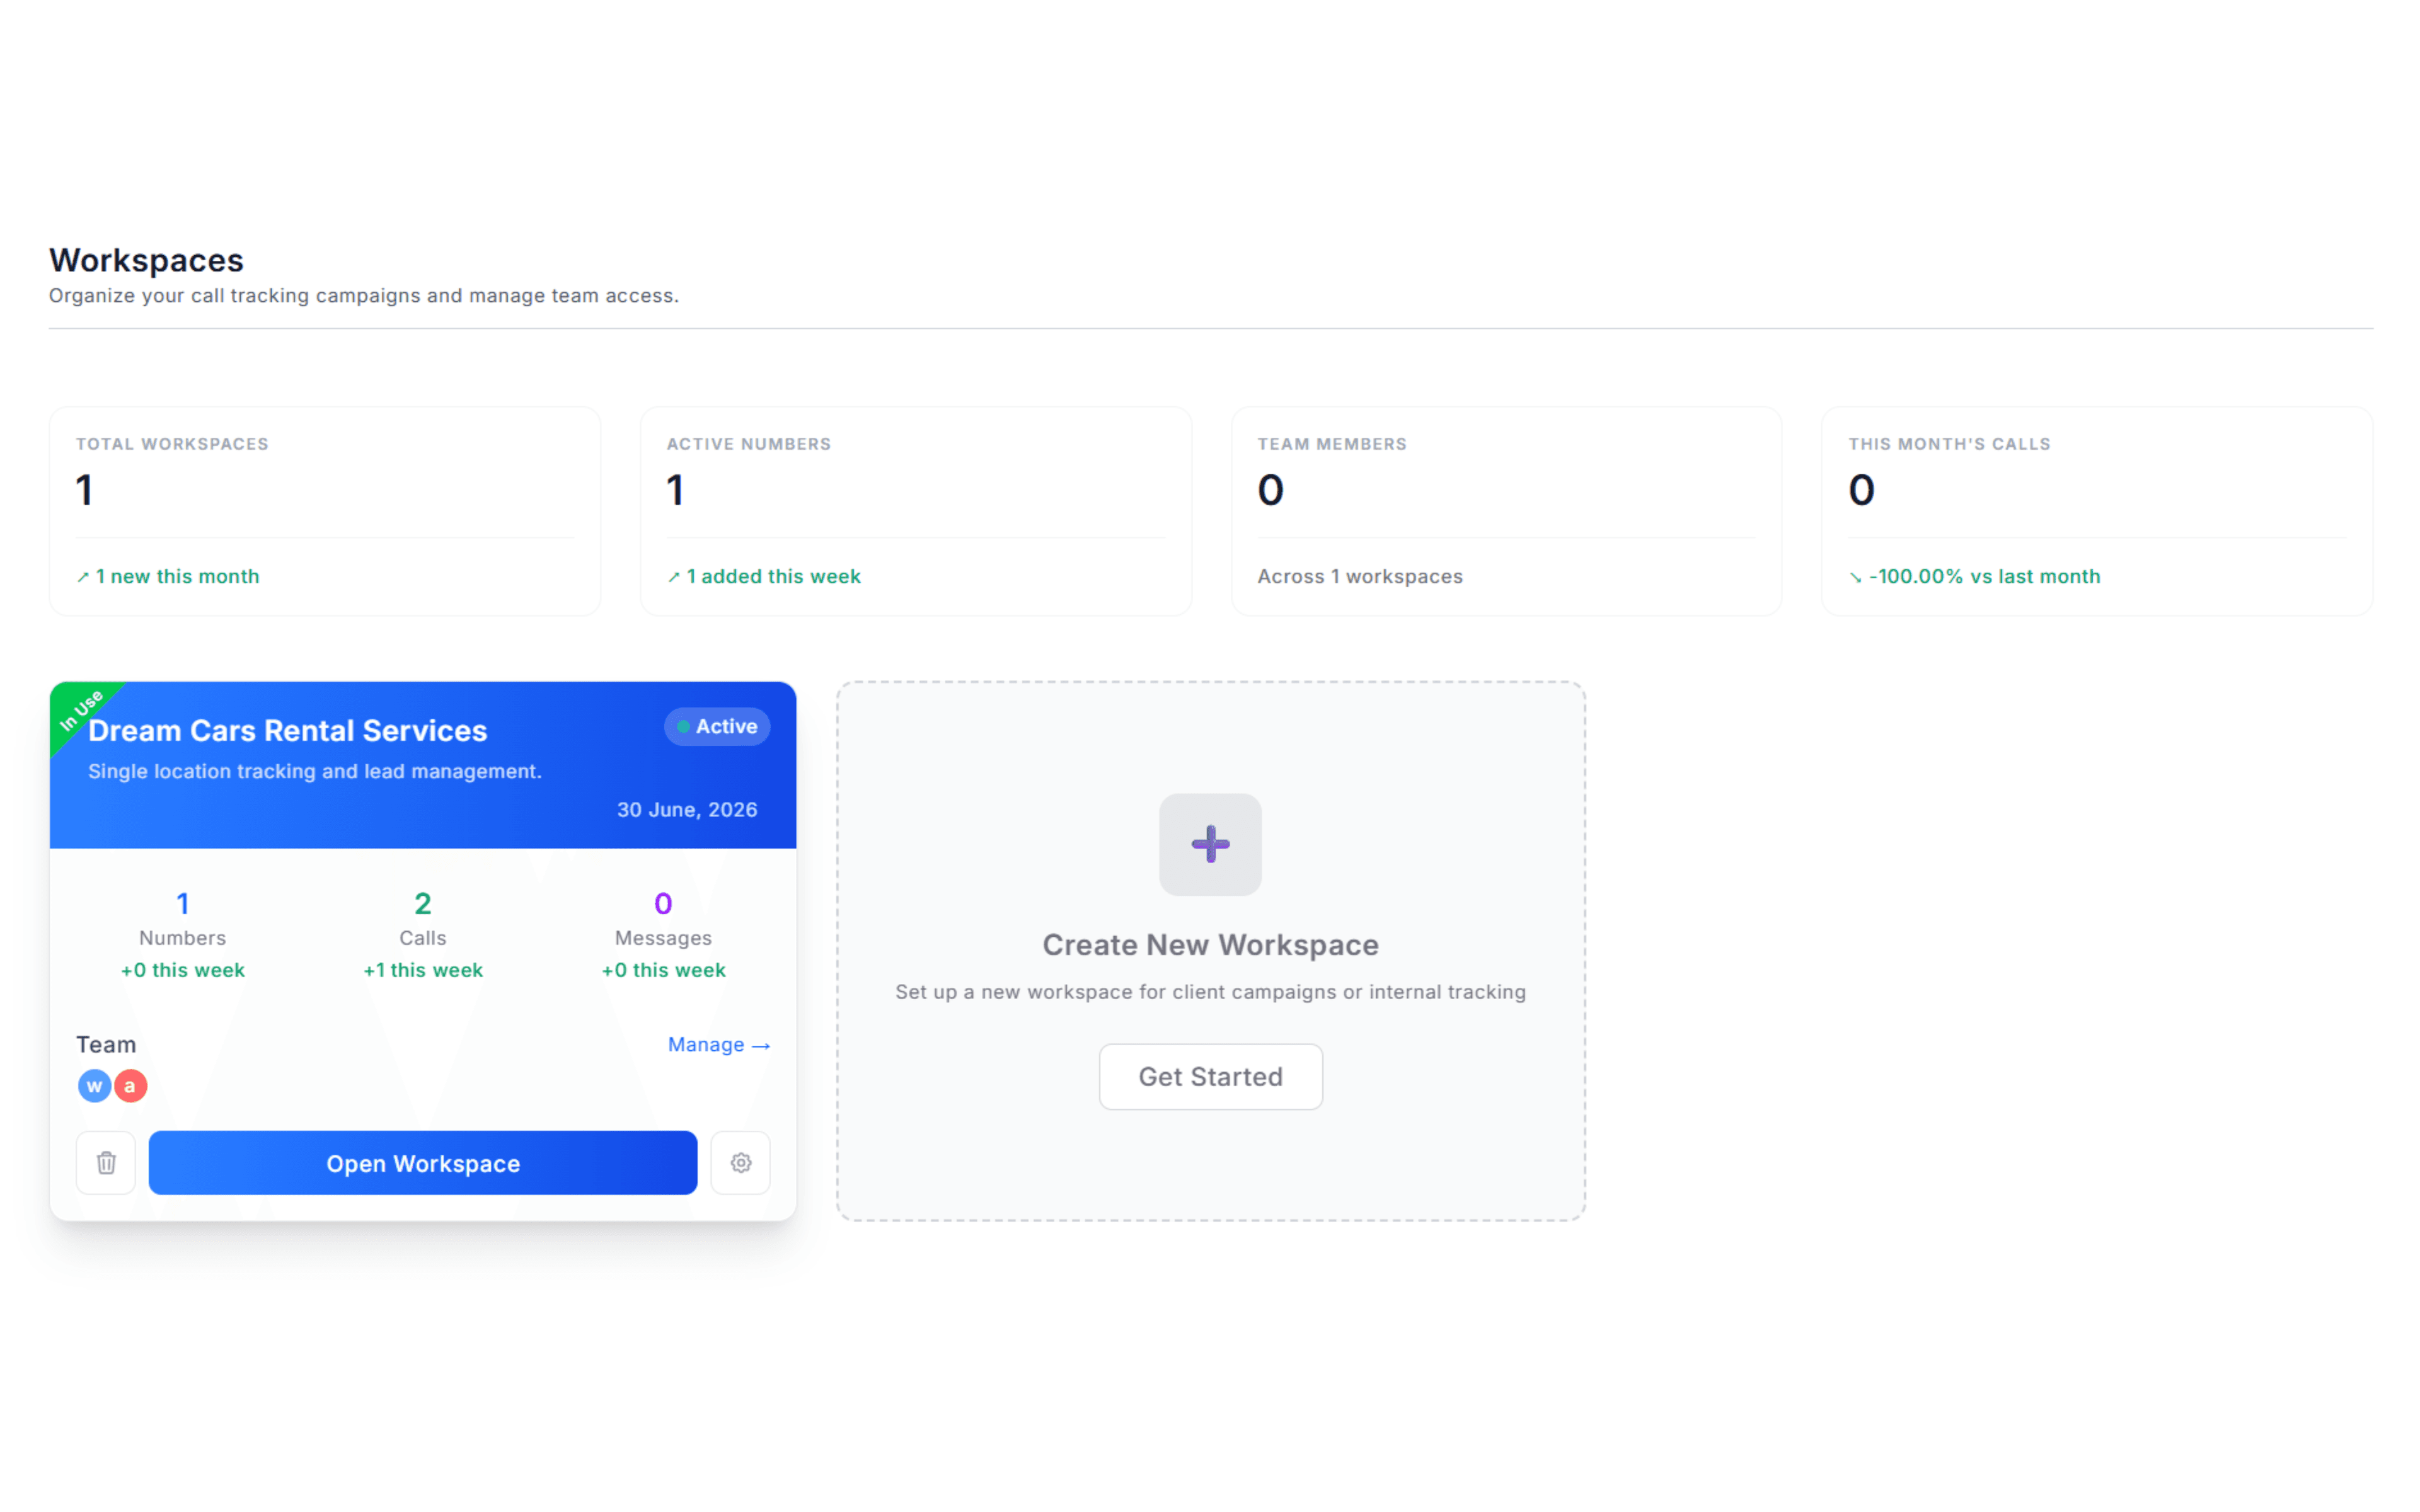
Expected Result
You are signed in and viewing your CallGauge AI workspace.
Purchase a Tracking Number or Number Pool
Choose the type of number setup that matches what you want to track.
Single tracking number
Purchase one number when you want to track a campaign, channel, listing or other fixed source.
DNI number pool
Purchase a pool when you want Dynamic Number Insertion to attribute website calls to individual visitor sessions and sources.
Choose the Correct Setup
Use a single number for source-level tracking. Use a number pool when configuring DNI for visitor-level website attribution.
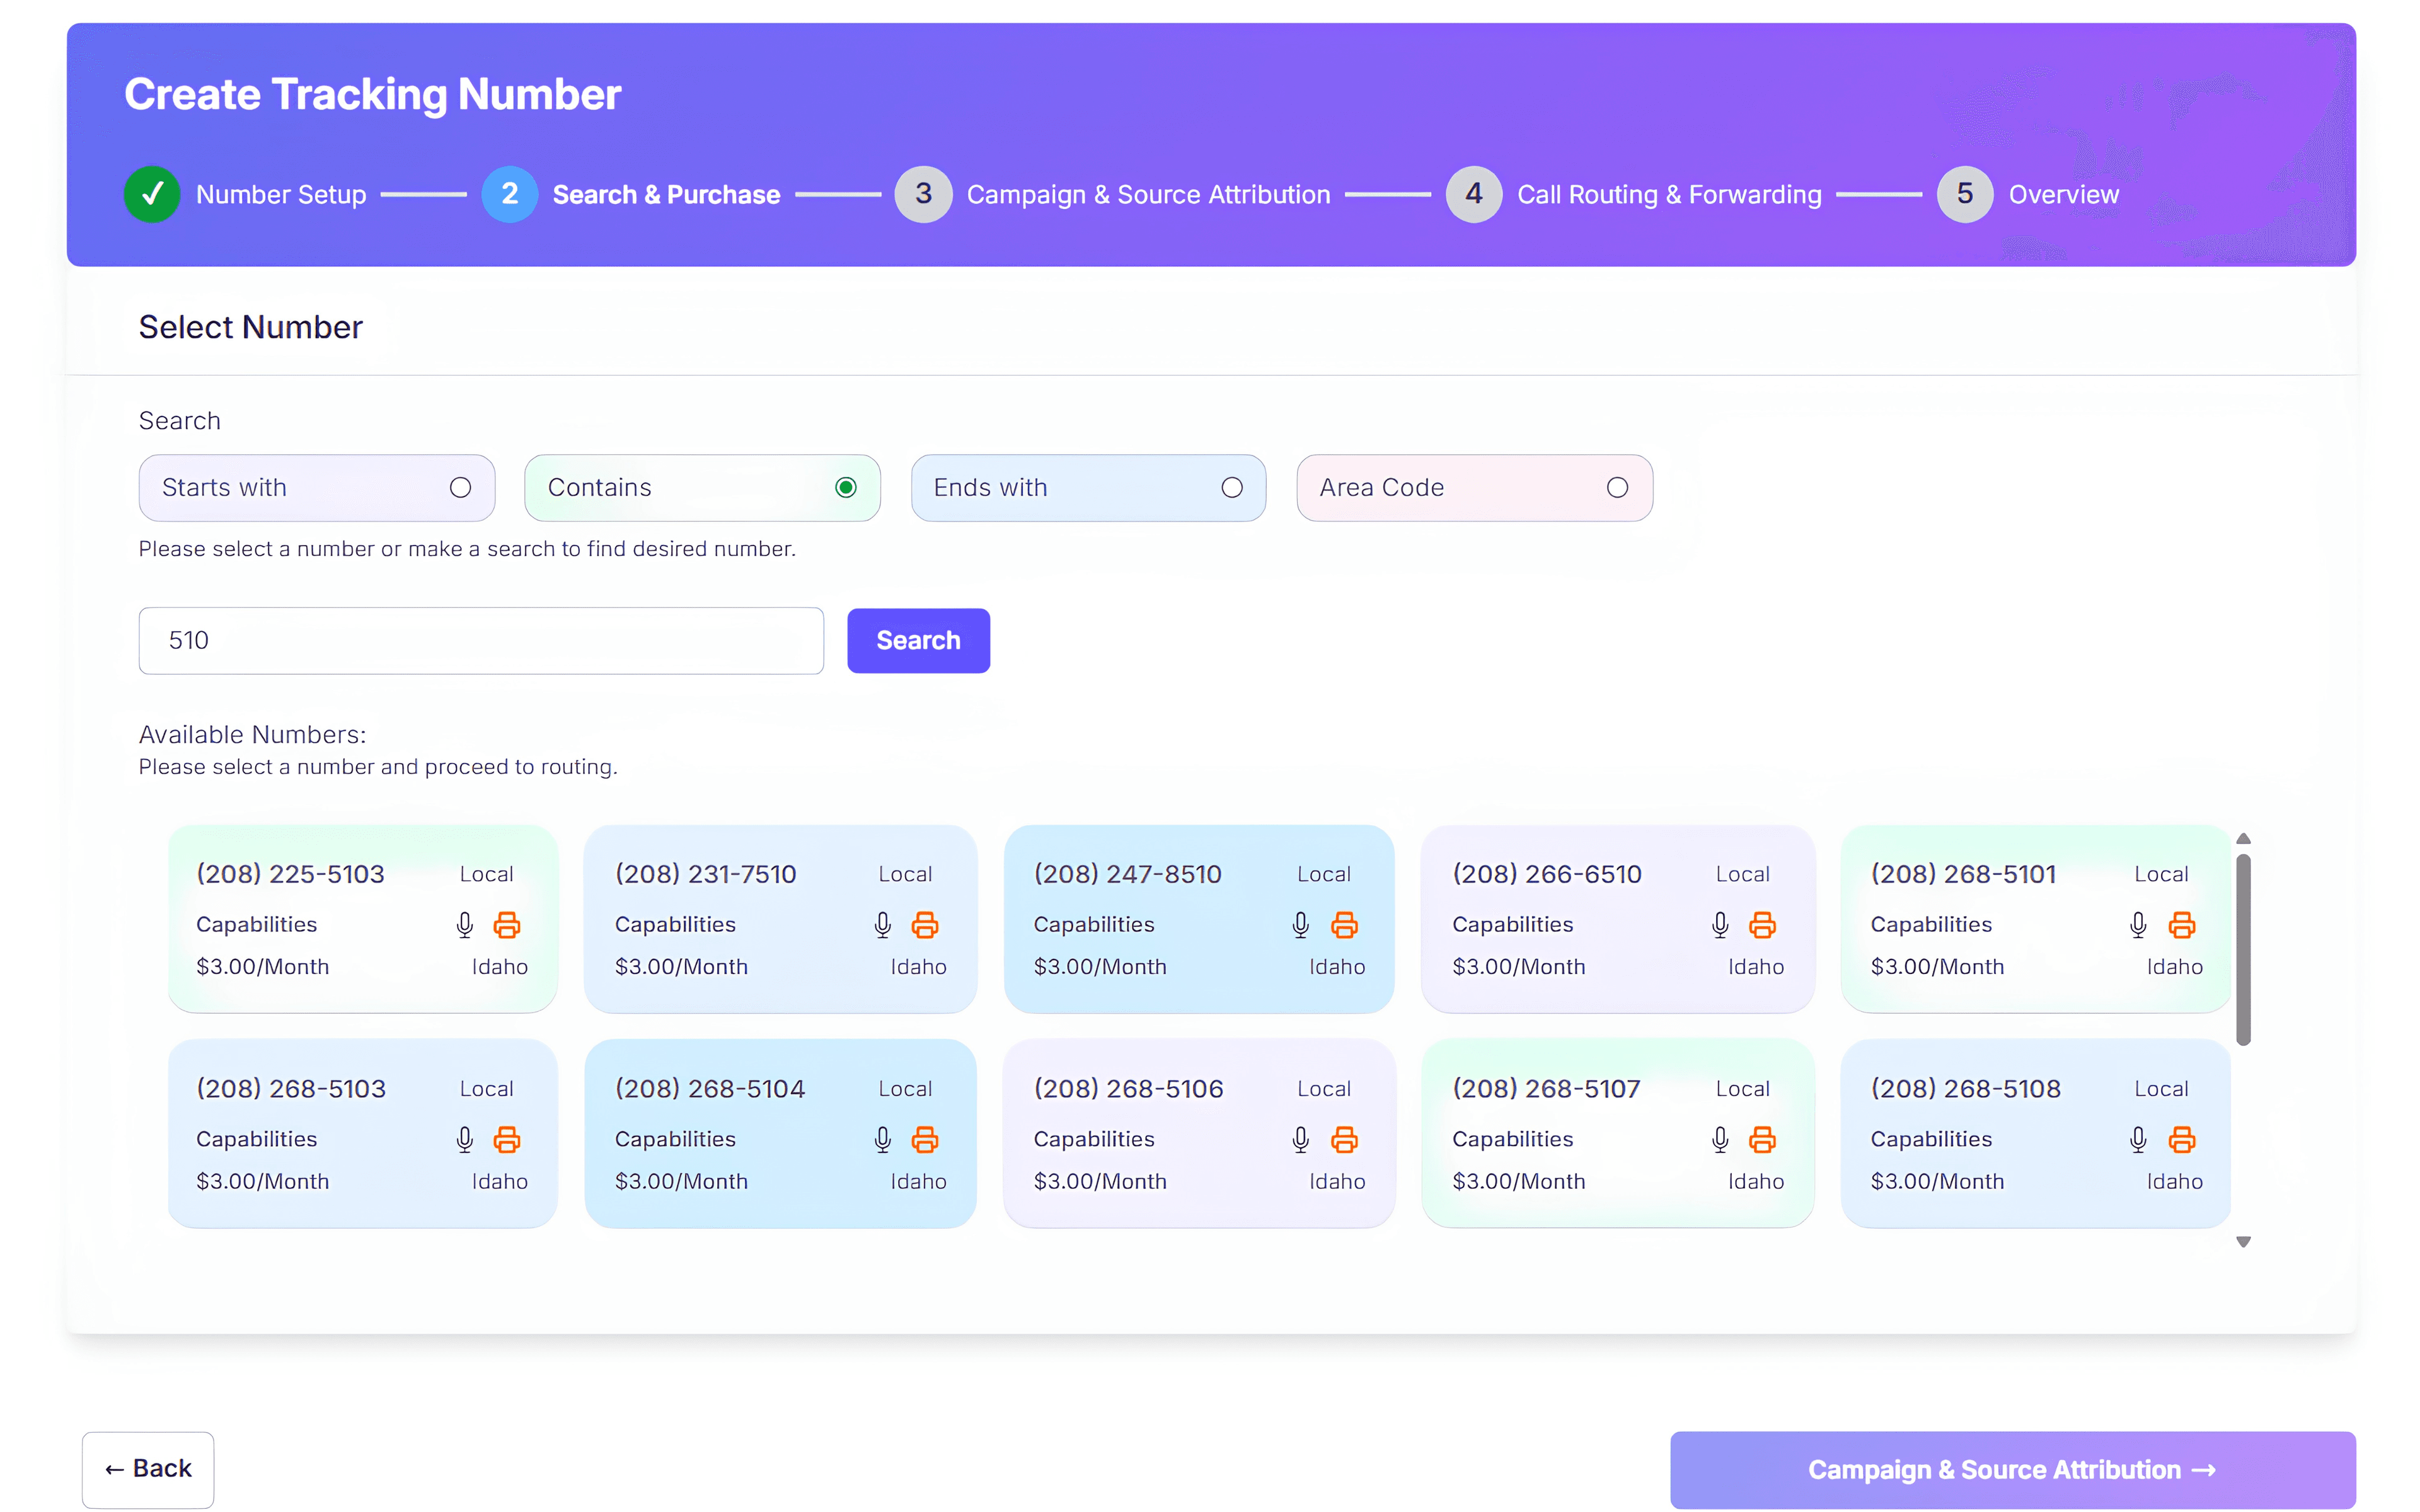
Expected Result
Your tracking number or DNI number pool is available inside the workspace.
Configure Dynamic Number Insertion
Complete this step when you purchased a number pool for website attribution. Create the DNI configuration, assign the number pool and install the CallGauge AI tracking script on your website.
Using a Single Tracking Number?
Skip this section when you are not using Dynamic Number Insertion. Continue to the call flow step.
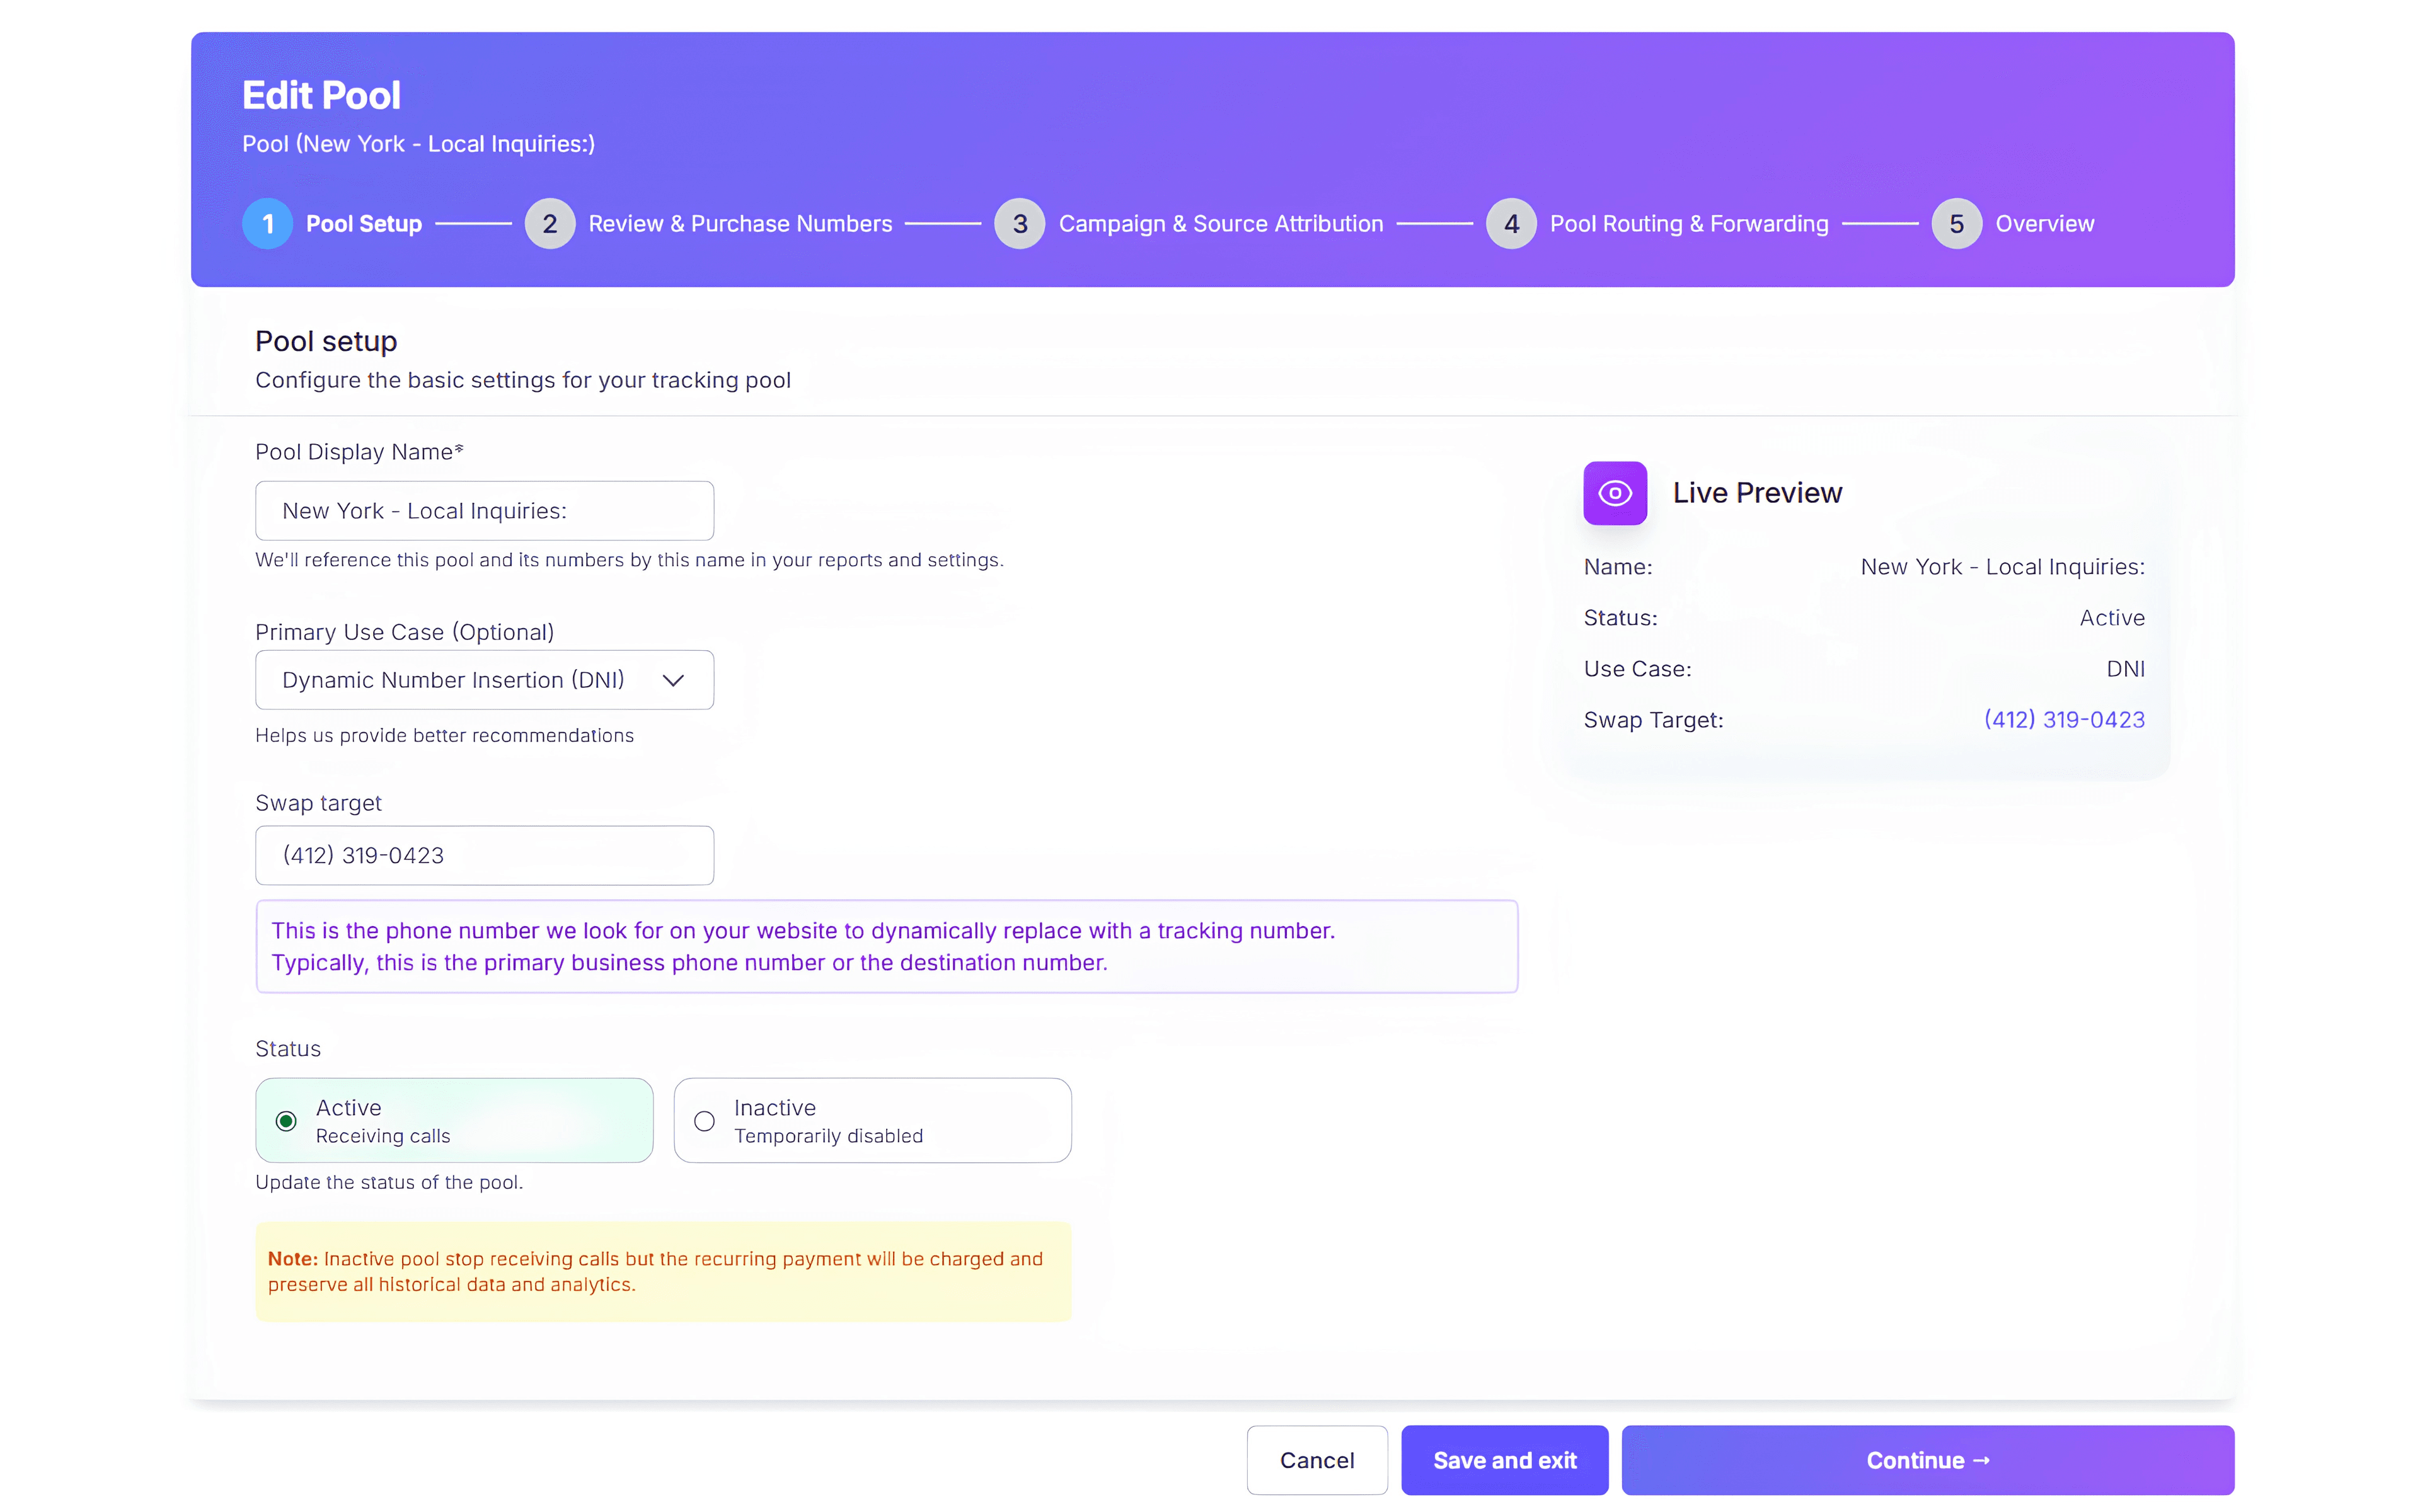
Expected Result
Your DNI number pool is configured and ready to display tracking numbers.
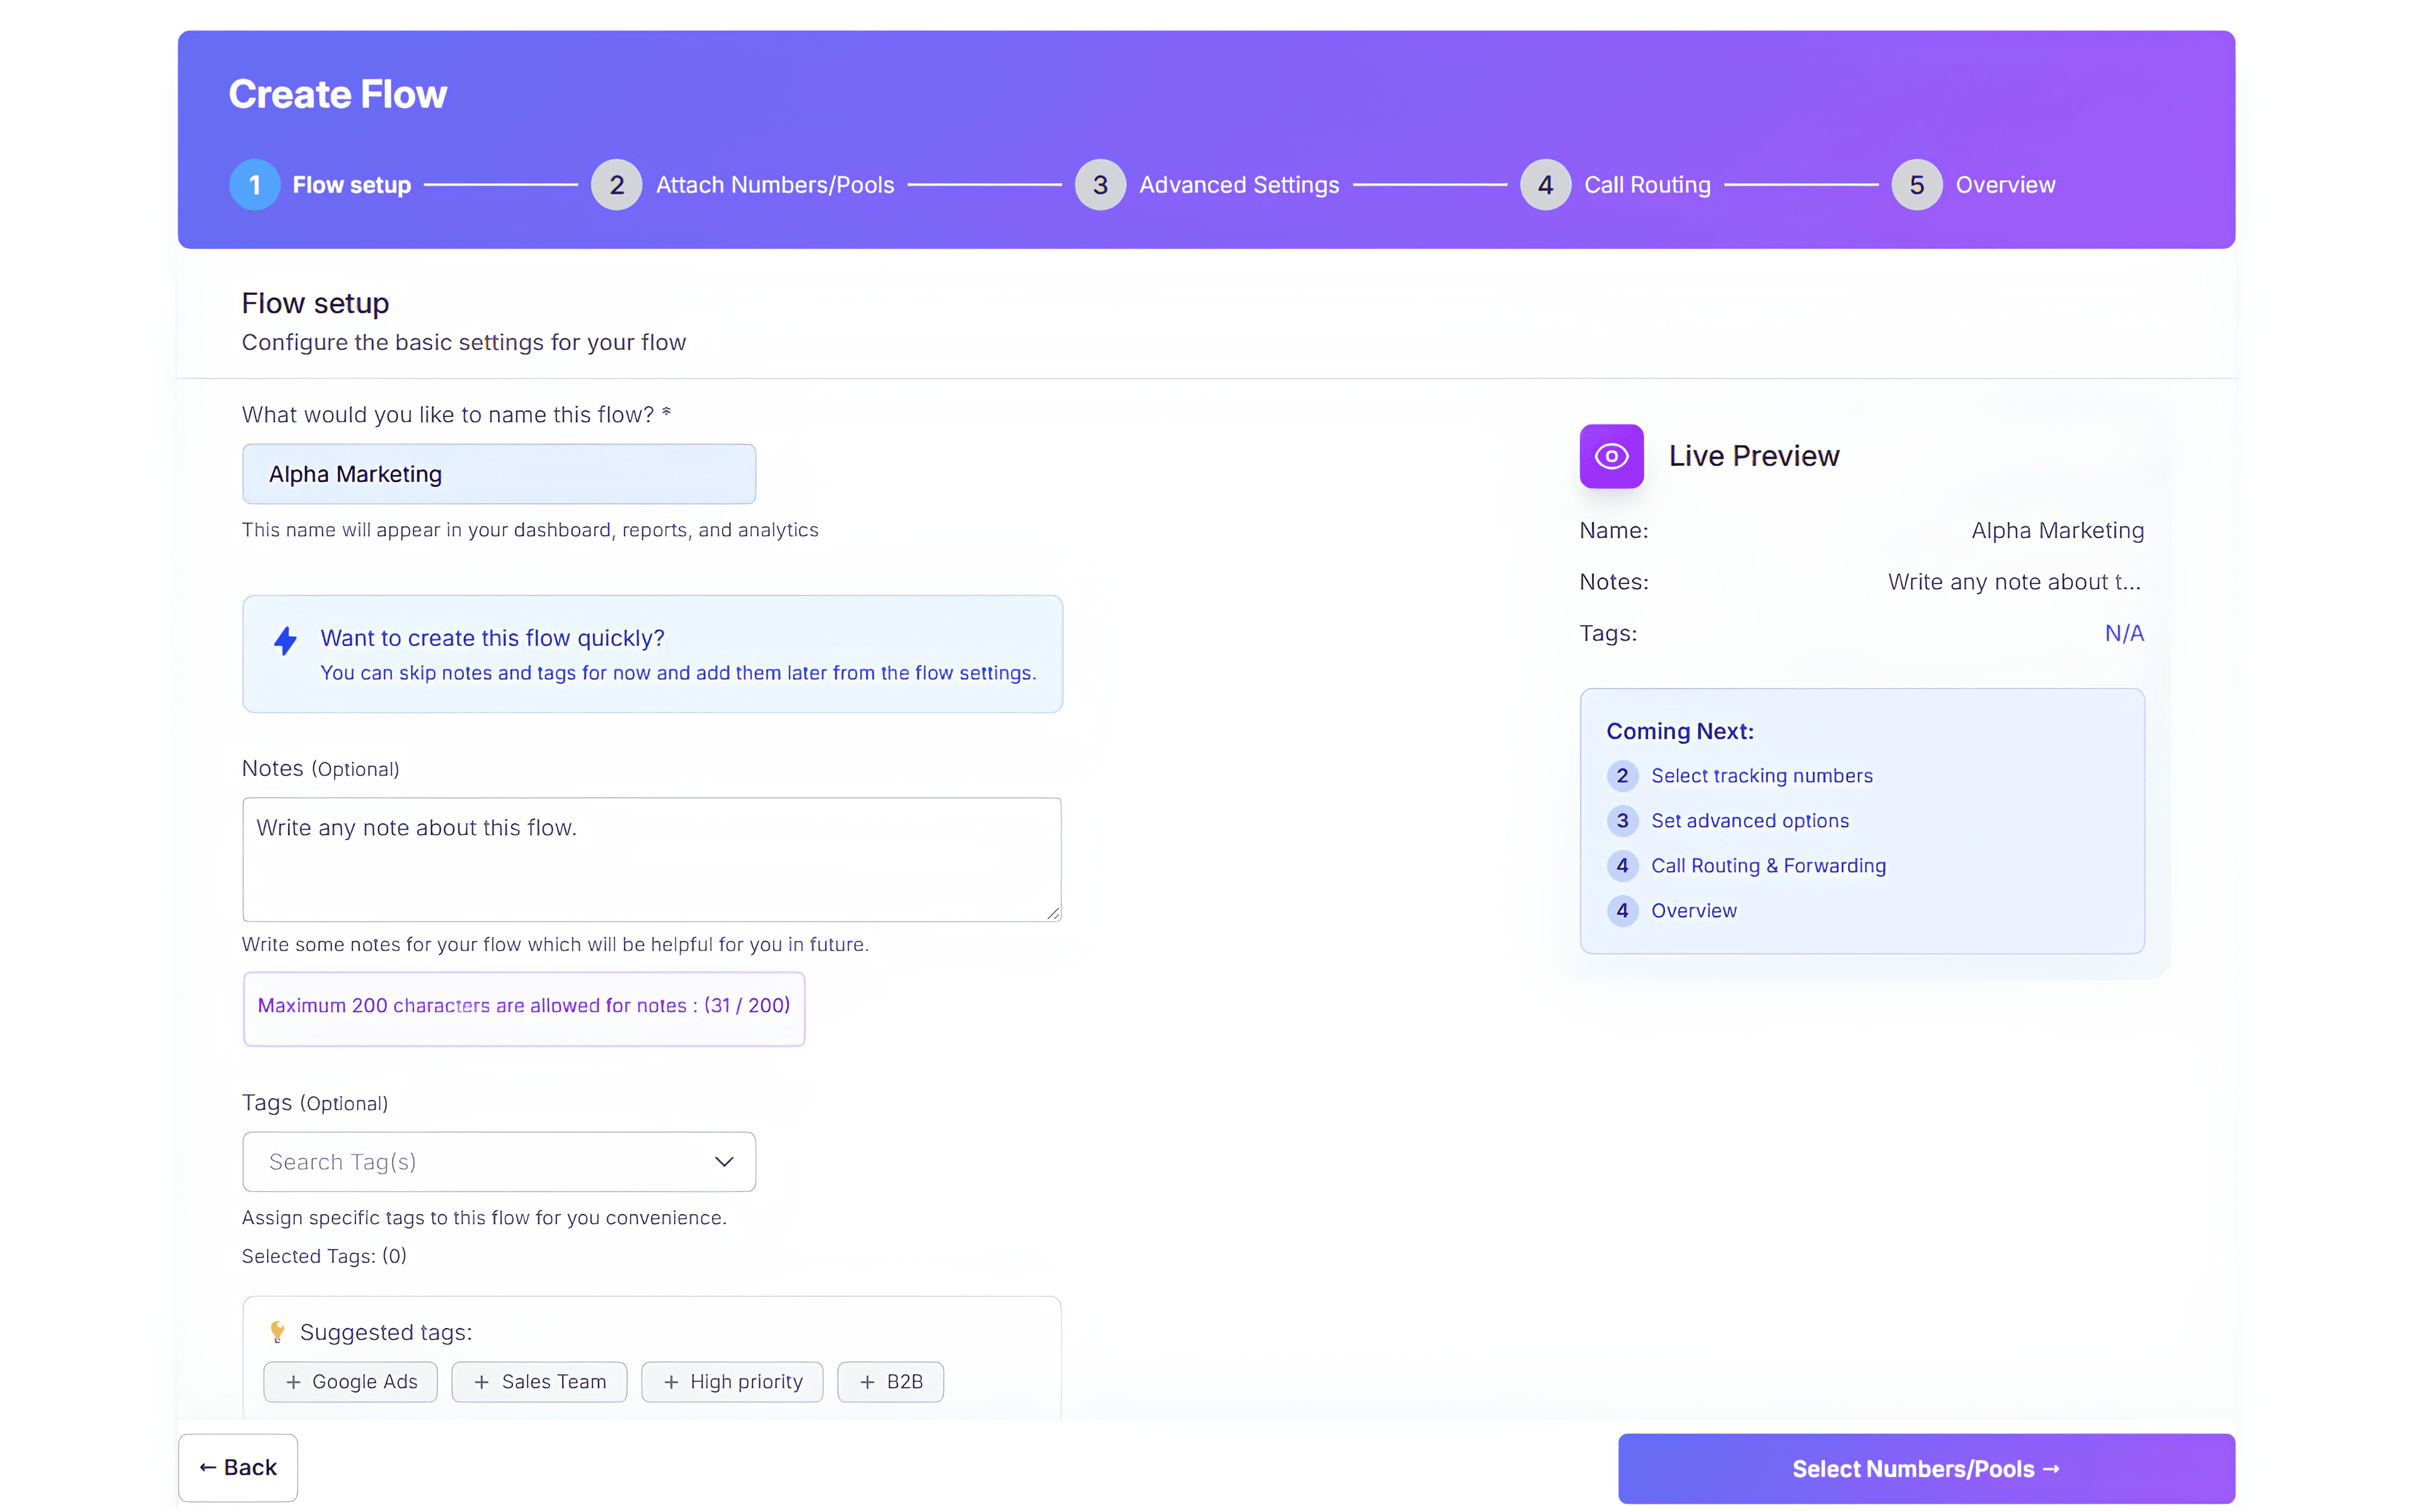
Create and Attach a Call Flow
Create a call flow that defines what happens when someone calls your tracking number. Add the destination number, routing rules and any supported greetings, schedules, multi-ringing or voicemail.
Important
A purchased number must have a call flow attached before it can route incoming calls to your business or team.
Expected Result
Your tracking number or number pool is connected to an active call flow.
Place a Test Call and Start Tracking
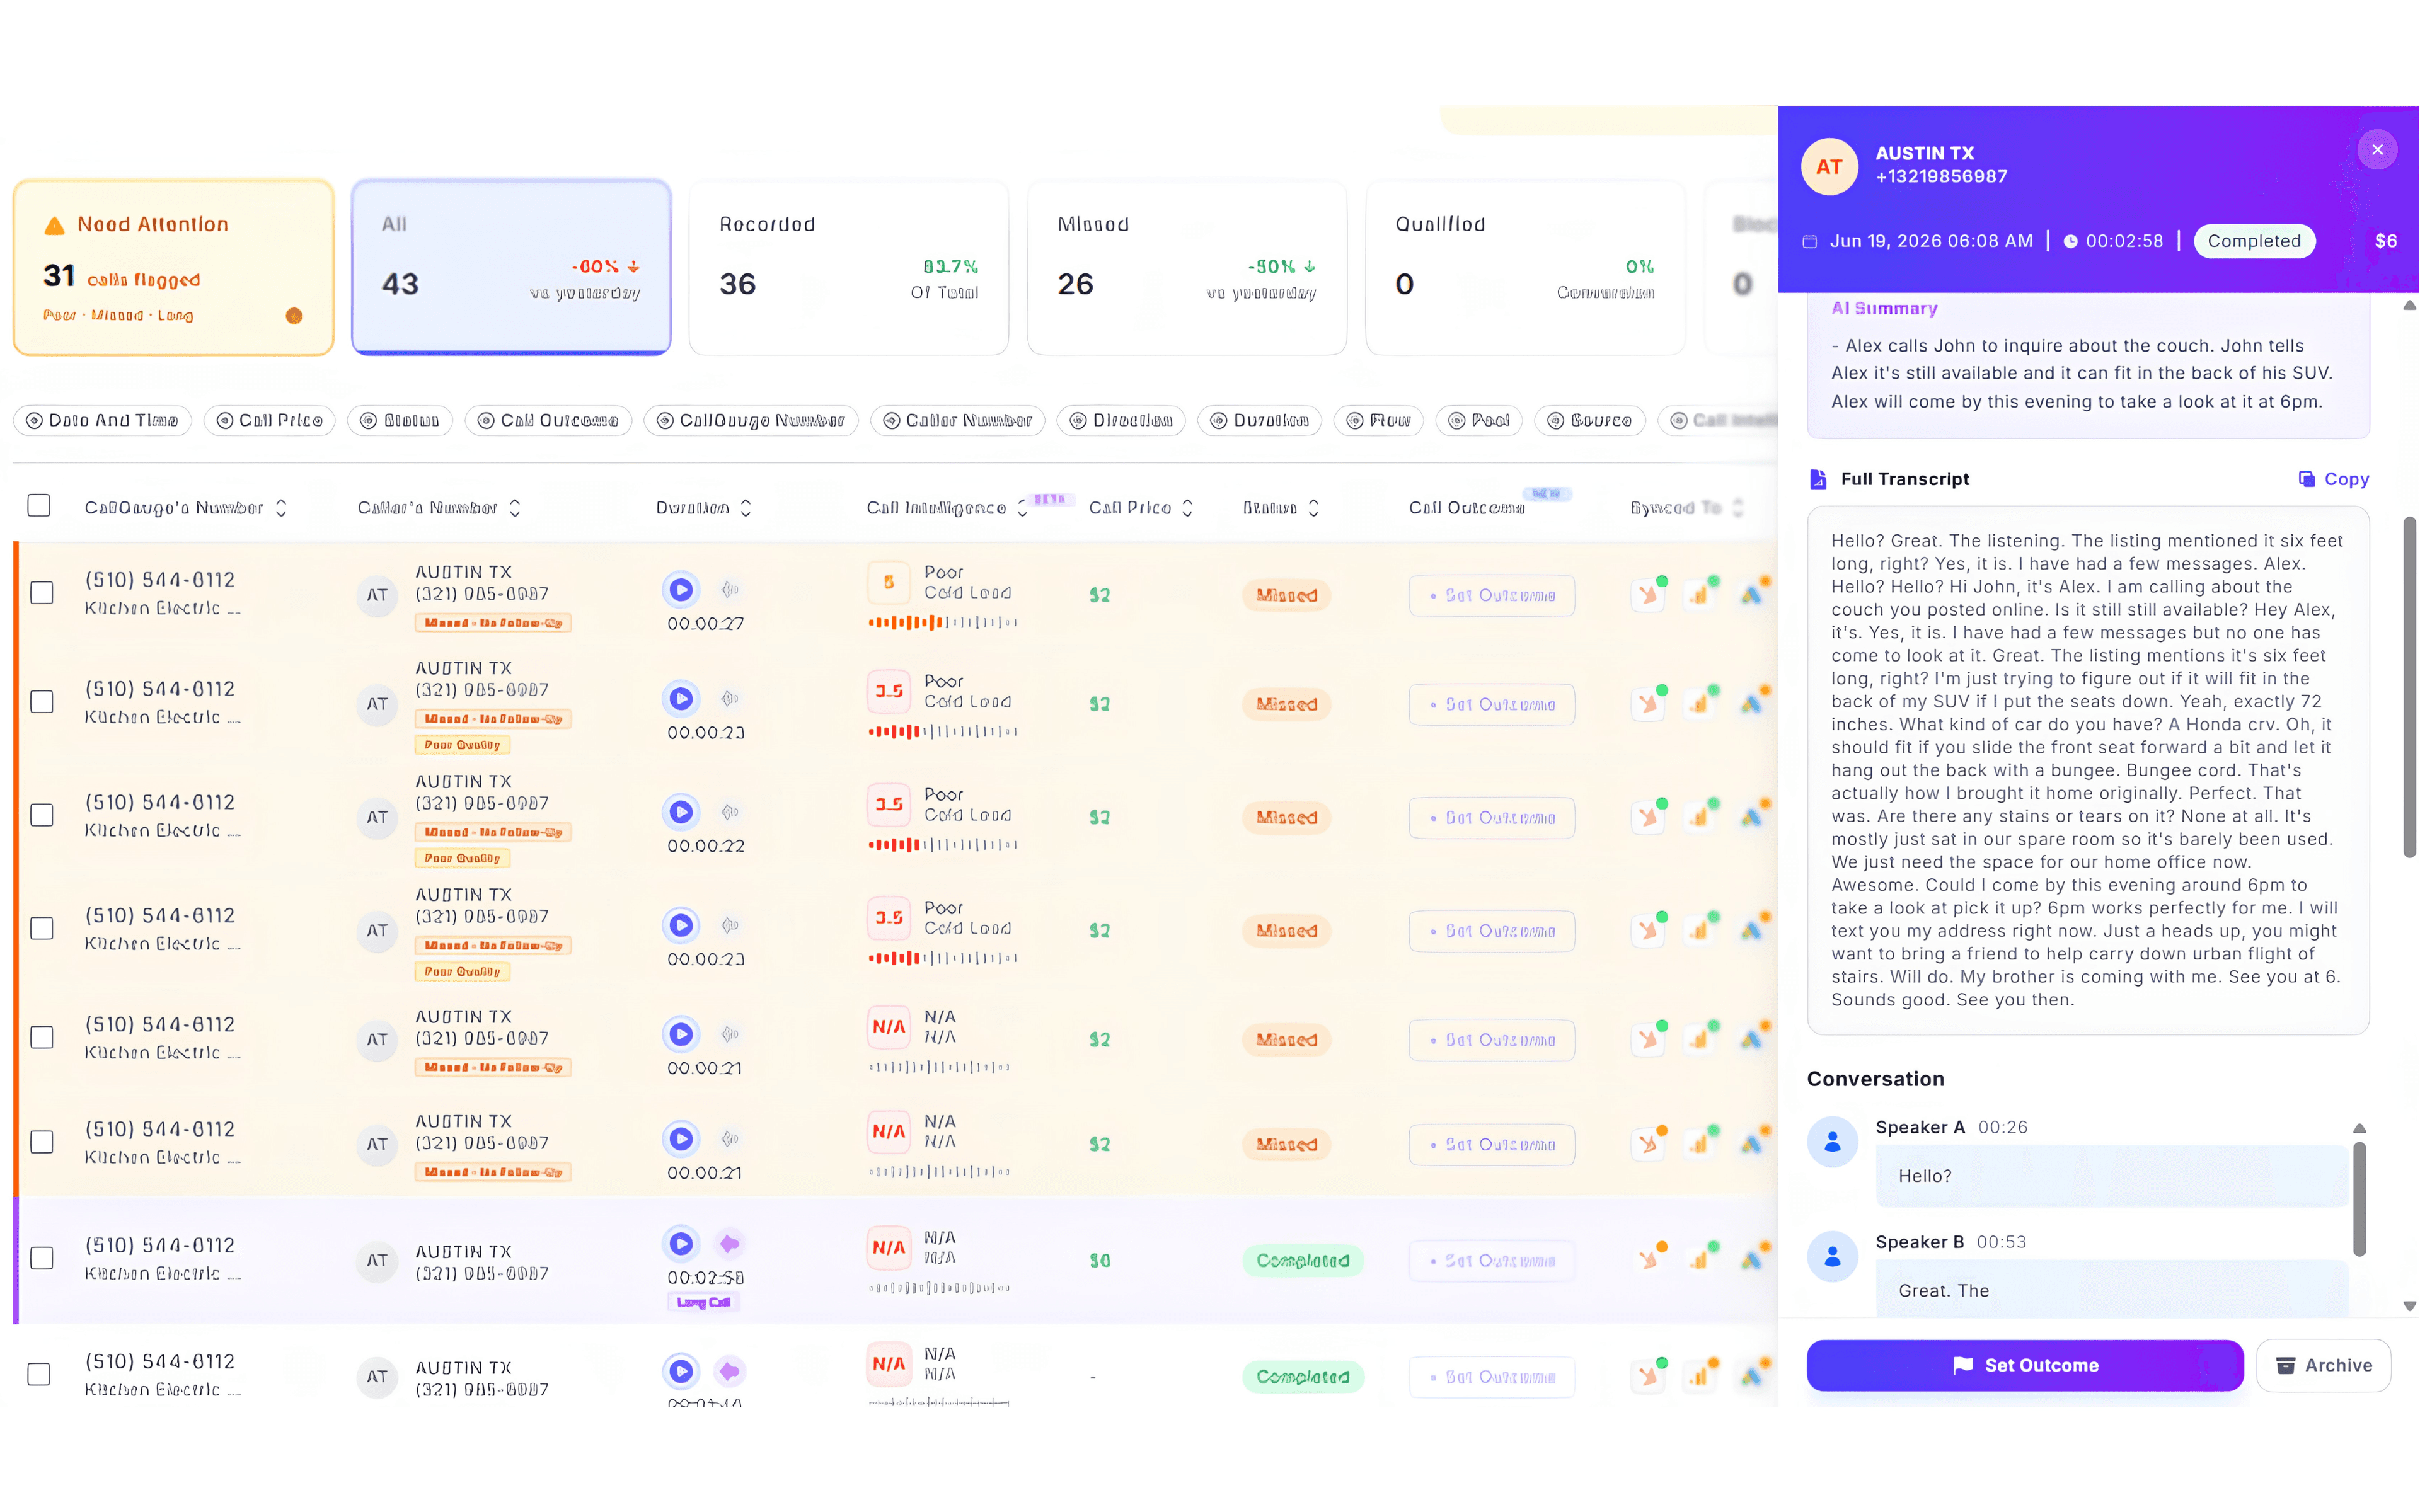
Call the tracking number and confirm that the call reaches the destination configured in the call flow. Then open the call log and verify that the test call appears.
For DNI Testing
Visit the website through a supported marketing source and check that the displayed phone number changes before placing the test call.
Expected Result
Your number is routing calls correctly and CallGauge AI is recording call activity.
Next Steps
Your Initial Setup Is Complete
Your account and workspace are active, your tracking number or number pool is available, and the attached call flow can route incoming calls.
Recommended Next Guides
Need help with setup?
Contact our support team at support@callgauge.ai.
Contact Our Support Team
Get help with your CallGauge AI account, product setup, integrations or technical questions.